How do I install and set up an eSIM on iOS device
Please check the following items in order to guarantee that you are able to successfully install and set up your eSIM:
1. Your Phone Supports eSIM Compatibility.
2. You have a stable Internet connection, preferably WiFi.
There are two ways of installing an eSIM on your device:
1. QR Code metho
2. Manual method
QR Code method Installation on an Iphone
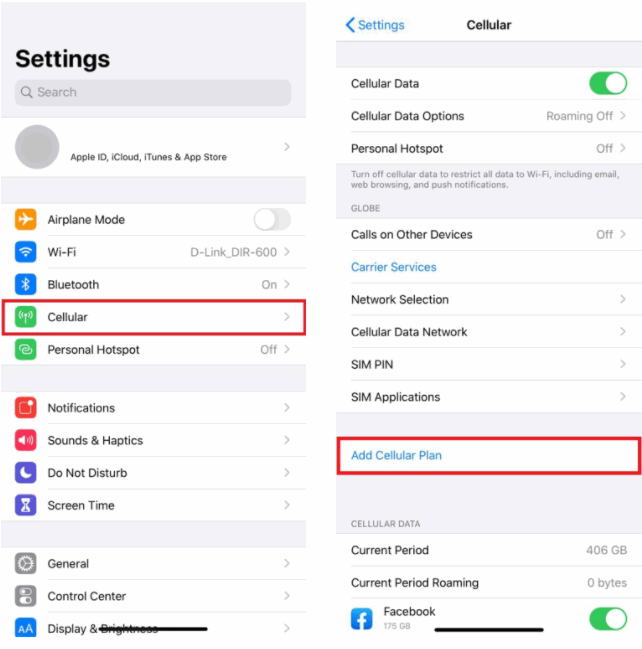
1. On your device, go to Settings
2. Tap Cellular or Mobile
3. Tap “Add eSIM” Or “Add Cellular Plan” or “Add Mobile Data Plan”
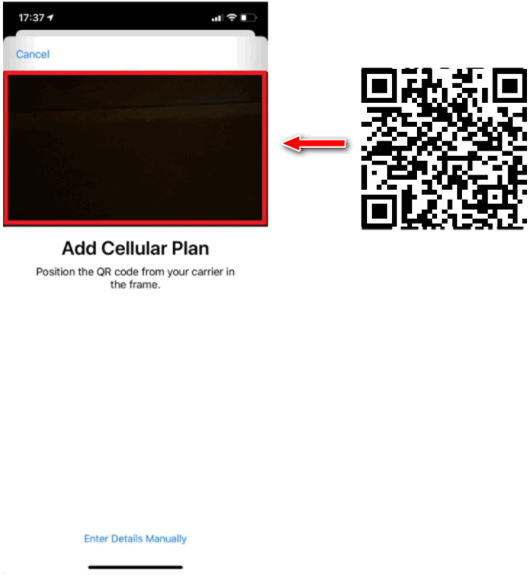
4. Use your printed QR code or another device that displays the QR code sach as a friends phone or computer to scan your eSIM QR Code
5. Choose a label or customized label for your eSIM.
6. Under the Default Line page, select your eSIM for cellular data only
7. You should see your new eSIM under your Cellular Data or Mobile Data Plans.
MANUAL METHOD TO INSTALL eSIM ON iPHONE
- On your device, go to Settings
- Tap Cellular or Mobile.
- Tap “Add eSIM” Or “Cellular Plan” or “Add Mobile Data Plan”.

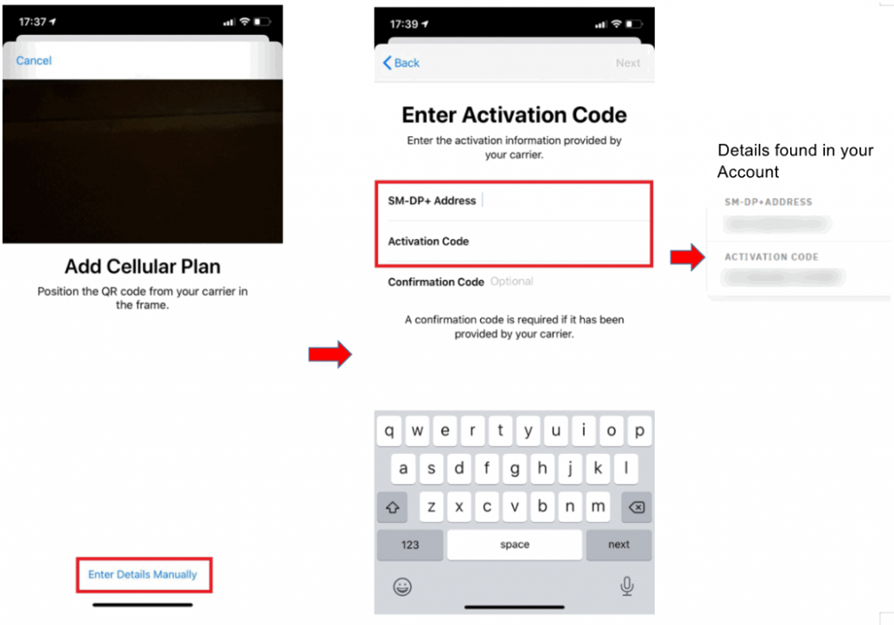
- Select Enter Details Manually. You will be asked to enter:
- Choose a label or customized label for your eSIM.
- Under the Default Line page, select your eSIM for cellular data only
- You should see your new eSIM under your Cellular Data or Mobile Data Plans.
DATA ROAMING (QR CODE OR MANUAL METHOD)
After installing your eSIM, you must also make the necessary adjustments
for connecting Data Roaming On your device
- On your device, go to Settings>Cellular or Settings>Mobile.
- Tap on your newly installed eSIM plan.
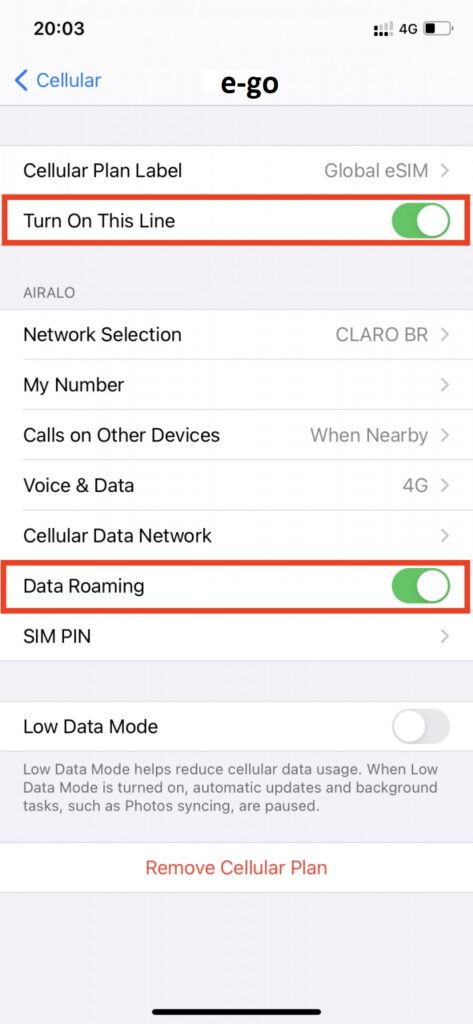
3. Toggle TURN ON THIS LINE for your eSIM and enable the Data Roaming
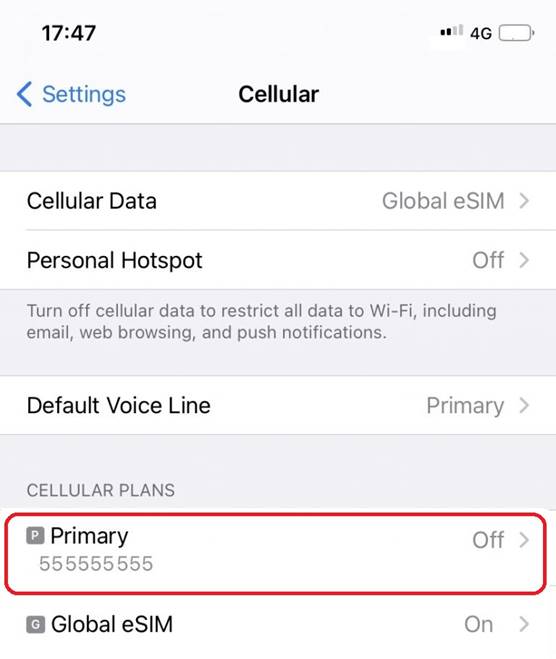
- On your device, go to Settings>Cellular
- Tap On the “Primary” Celular Plan and turn it to “Off”